반응형
crawl2_webdriver

Crawling 2 WebDriver

브라우저로 볼때는 분명 데이터가 있는데, 크롤링으로 HTML을 가져와서 보면 없는 경우가 있다.
이것은 브라우저에는 JS를 구동기능이 포함되어 HTML 문서가 동적으로 변화하기 때문에 단순하게 네트웍으로 HTML 문서를 받은 것과 항상 일치한다는 보장이 없기 때문이다
따라서 브라우저처럼 작동하여 변화된 HTML을 만들면 원하는 정보를 얻을 수 있는데 이것이 web driver이다.

구글 크롬 브라우저의 경우 이러한 것을 제공한다.
파이썬에서는 selenium 패키지를 설치하고, 운영체제에는 ChromeDriver를 설치해야 한다.
중요한 것은 현재 크롬브라우저의 버전과 ChromeDriver의 버전이 일치해야 한다!!!
버전이 다르다면 작동하지 않을 것이다.

https://sites.google.com/a/chromium.org/chromedriver/downloads
image

여기에서 자신의 크롬브라우저와 같은 버전의 드라이버를 받는다. 드라이버는 실행파일인데, PATH에 연결된 경로에 실행파일을 복사하면 준비가 다 된것이다.

전에 실패한 실시간 기사 조회

전에 코드에서 html 을 urllib으로 가져오지 말고 web driver를 구동하여 가져와서 파싱해 보자.

from selenium import webdriver
from bs4 import BeautifulSoup

url = 'https://m.media.daum.net/m/media/economic'

options = webdriver.ChromeOptions()
options.add_argument('headless')
browser = webdriver.Chrome(chrome_options=options)
browser.implicitly_wait(3)

browser.get(url)
html = browser.page_source
soup = BeautifulSoup(html, 'html.parser')

subnews = soup.find("div", "section_sub")
realnews = subnews.find("div", "box_realtime")
print(realnews)

browser.quit()


output

<div class="box_g box_realtime">
<h3 class="tit_g">실시간 주요 경제 뉴스</h3>
<ul category="economic" class="list_thumb">
<li>
<a class="link_news #MAIN_NEWS#article @1" href="http://v.media.daum.net/v/20191023201603468?f=m">
<div class="wrap_thumb">
<img alt="삼성물산 '1조6천억 분식회계' 적발..수천억 손실이 순익 둔갑" class="thumb_g" height="68" src="//t1.daumcdn.net/thumb/F240x180ht.u/?fname=https%3A%2F%2Ft1.daumcdn.net%2Fnews%2F201910%2F23%2Fhani%2F20191023201603606uvoz.jpg"/>
</div>
<div class="cont_thumb">
<strong class="tit_thumb">
<span class="txt_g">삼성물산 '1조6천억 분식회계' 적발..수천억 손실이 순익 둔갑</span>
<span class="txt_cp">5분전</span>
</strong>
</div>
</a>
</li>
<li>
<a class="link_news #MAIN_NEWS#article @2" href="http://v.media.daum.net/v/20191023191757086?f=m">
<div class="wrap_thumb">
<img alt='野, 기재부에 "민부론 검토자료 내놔라"..與 "제출 의무 없어"' class="thumb_g" height="68" src="//t1.daumcdn.net/thumb/F240x180ht.u/?fname=https%3A%2F%2Ft1.daumcdn.net%2Fnews%2F201910%2F23%2Fnewsis%2F20191023191757773esif.jpg"/>
</div>
<div class="cont_thumb">
<strong class="tit_thumb">
<span class="txt_g">野, 기재부에 "민부론 검토자료 내놔라"..與 "제출 의무 없어"</span>
<span class="txt_cp">1시간전</span>

전에는 ul 태그 내부가 비었었는데 이제 내용을 가져올 수 있게 되었다.
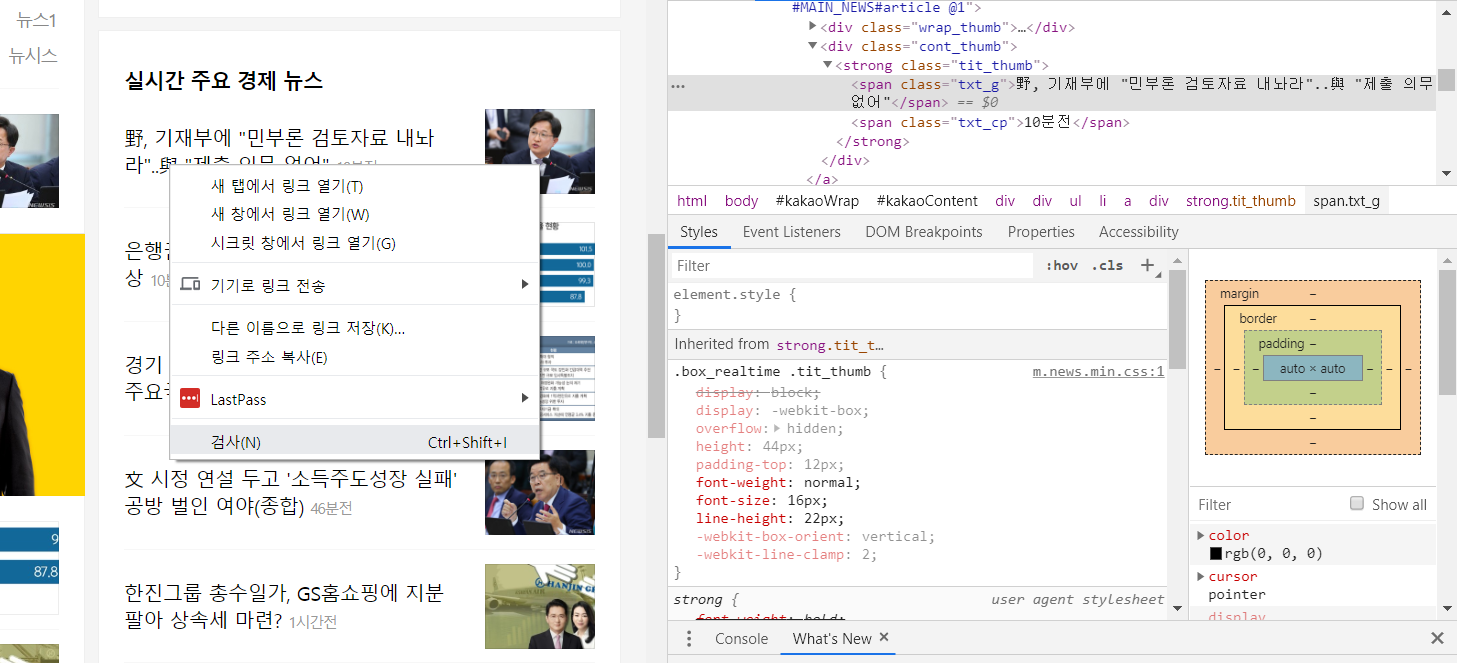
코드를 정리하여 기사 제목만 가져와보자. 이것도 좀 더 쉽게 하려면 F12키로 개발자모드로 간 다음 추출할 부분에 대해 selector 값을 쉽게 가져올 수 있다.
image
selector를 적당히 수정하면 목록을 쉽게 추출할 수있다.

# news = soup.select('#kakaoContent > div.section_sub > div.box_g.box_realtime > ul > li:nth-child(1) > a > div.cont_thumb > strong > span.txt_g')
news = soup.select('#kakaoContent > div.section_sub > div.box_g.box_realtime > ul > li > a > div.cont_thumb > strong > span.txt_g')
for item in news:
    print(item.text)

output

삼성물산 '1조6천억 분식회계' 적발..수천억 손실이 순익 둔갑
野, 기재부에 "민부론 검토자료 내놔라"..與 "제출 의무 없어"
은행권 "예대율 낮춰라".. 예금 확보 비상
경기 하강기 커지는 재정 역할.."세계 주요국도 확장 정책"
文 시정 연설 두고 '소득주도성장 실패' 공방 벌인 여야(종합)
한진그룹 총수일가, GS홈쇼핑에 지분 팔아 상속세 마련?
홍남기 "법인세 인하 투자증가로 연결 안 돼..신중한 입장"
김영진, 기재위 국감서 '황교안 계엄령 개입' 의혹 언급..野 반발
[단독]에어부산, 괌에서 '기체결함'으로 긴급 회항..13시간 지연 출항
[단독]정부 '직무급 도입-임금체계 개편' 병합 논의

전에 단순한 방식으로 안되는 작업이 이제 원하는 부분을 깔끔하게 추출하였다.

추가로…

아래는 만약 같은 페이지내에서 뭔가를 클릭해야 내용이 더 보여서 그 내용도 추출하기 위한 작업이다.

다음 실시간 검색어 조회

모바일용 웹 주소를 이용하였다. 일반 PC용 주소로 사용하면 데이터가 많아서 느릴 수 있으니 텍스트 위주의 페이지로 접근하는 것이 더 용이하다.
중간에 보면 실시간 검색어 목록이 다 나오도록 확장 버튼을 클릭하는 것을 추가하였다.

from selenium import webdriver
from bs4 import BeautifulSoup

def getTop10Daum():
    url = "https://m.daum.net"

    # browser = webdriver.PhantomJS()
    # browser.implicitly_wait(3)

    options = webdriver.ChromeOptions()
    options.add_argument('headless')
    # browser = webdriver.Chrome(options=options)
    # browser = webdriver.Chrome()
    browser = webdriver.Chrome(chrome_options=options)
    browser.implicitly_wait(3)

    browser.get(url)
    browser.save_screenshot("web1.png")

    # mAside > div.head_issue > div.roll_issue.\#searchrank\#rolling > strong > a

    # browser.find_element_by_xpath('//*[@id="mAside"]/div[1]/div[1]/strong/a').click()
    browser.find_element_by_css_selector('div.roll_issue.\#searchrank\#rolling > strong > a').click()
    browser.save_screenshot("web2.png")

    html = browser.page_source
    soup = BeautifulSoup(html, 'html.parser')
    # print(soup)
    notices = soup.select('div.realtime_layer div.panel')

    resultlist = []

    for n in notices:
        # print ('aria-hidden-', n['aria-hidden'])
        if n['aria-hidden']=='false':
            lis = n.select('li')
            for l in lis:
                result = dict()
                result['rank'] = l.select_one('.num_issue').text
                result['title']= l.select_one('.txt_issue').text
                result['url'] = l.a['href']
                # print(l.select_one('.num_issue').text)
                # print(l.select_one('.txt_issue').text)
                # print('href=',l.a['href'])
                resultlist.append(result)
    browser.quit()

    # print(resultlist)
    return resultlist


if __name__ == '__main__':
    items = getTop10Daum()
    for it in items:
        print(it['rank'], it['title'], it['url'])

output

1 서효림 https://m.search.daum.net/search?w=tot&q=%EC%84%9C%ED%9A%A8%EB%A6%BC&DA=ATG&nil_mtopsearch=issuekwd&logical=issue&pin=issue
2 이다희 https://m.search.daum.net/search?w=tot&q=%EC%9D%B4%EB%8B%A4%ED%9D%AC&DA=ATG&nil_mtopsearch=issuekwd&logical=issue&pin=issue
3 김칠준 변호사 https://m.search.daum.net/search?w=tot&q=%EA%B9%80%EC%B9%A0%EC%A4%80+%EB%B3%80%ED%98%B8%EC%82%AC&DA=ATG&nil_mtopsearch=issuekwd&logical=issue&pin=issue
4 정경심 교수 https://m.search.daum.net/search?w=tot&q=%EC%A0%95%EA%B2%BD%EC%8B%AC+%EA%B5%90%EC%88%98&DA=ATG&nil_mtopsearch=issuekwd&logical=issue&pin=issue
5 송성문 https://m.search.daum.net/search?w=tot&q=%EC%86%A1%EC%84%B1%EB%AC%B8&DA=ATG&nil_mtopsearch=issuekwd&logical=issue&pin=issue
6 김준기 https://m.search.daum.net/search?w=tot&q=%EA%B9%80%EC%A4%80%EA%B8%B0&DA=ATG&nil_mtopsearch=issuekwd&logical=issue&pin=issue
7 오재일 https://m.search.daum.net/search?w=tot&q=%EC%98%A4%EC%9E%AC%EC%9D%BC&DA=ATG&nil_mtopsearch=issuekwd&logical=issue&pin=issue
8 김수미 아들 https://m.search.daum.net/search?w=tot&q=%EA%B9%80%EC%88%98%EB%AF%B8+%EC%95%84%EB%93%A4&DA=ATG&nil_mtopsearch=issuekwd&logical=issue&pin=issue
9 인헌고등학교 https://m.search.daum.net/search?w=tot&q=%EC%9D%B8%ED%97%8C%EA%B3%A0%EB%93%B1%ED%95%99%EA%B5%90&DA=ATG&nil_mtopsearch=issuekwd&logical=issue&pin=issue
10 이승호 https://m.search.daum.net/search?w=tot&q=%EC%9D%B4%EC%8A%B9%ED%98%B8&DA=ATG&nil_mtopsearch=issuekwd&logical=issue&pin=issue

Author: crazyj7@gmail.com

'Python' 카테고리의 다른 글

진법 표현 및 수 스트링 변환  (0) 2019.11.24
크롤링 BeautifulSoup 요약  (1) 2019.11.06
웹 크롤링 Crawl 1편  (0) 2019.10.24
인코딩에러 cp949  (1) 2019.10.02
ipynb와 py 양방향 전환  (2) 2019.09.30
반응형
crawl1

Crawling 크롤링

파이썬으로 간단하게 Web 페이지 크롤링하기.

인터넷 상의 자료들을 프로그래밍을 하여 Web URL로 받아 분석하여 필요한 정보를 가공하는 작업.

1단계 HTML 그대로 받기

HTML이 있는 URL 주소를 입력하면 대부분 그대로 보이는 페이지를 긁어올 수 있다. (로그인 인증이 필요하거나 특정 조건이 필요한 경우는 고급 방식을 사용해야 한다.)

### daum 기사 수집  
import urllib.request  
from bs4 import BeautifulSoup  
  
url = 'https://m.media.daum.net/m/media/economic'  
  
conn = urllib.request.urlopen(url)  
# art_eco = conn.read()  
soup = BeautifulSoup(conn, "html.parser")  
  
# print(soup)  
with open('output.txt', 'wt', encoding='utf8') as f:  
    f.write(str(soup))

print로 출력할 수도 있지만 보통 내용이 많아 파일로 저장해서 분석한다.
스트링 검색으로 원하는 부분을 잘 찾는다.

2단계 HTML 파싱하여 필요한 부분만 뽑기

HTML 내용에서 일부만을 발췌하고 싶다면 HTML 구조를 파악하여 어떻게 필요한 부분만을 select 할 수 있는 방법을 알아야 한다. BeautifulSoup 모듈을 사용하면 그나마 쉽게(?) 추출할 수 있다.
보통 홈페이지의 HTML은 시일이 지나면 업데이트되어 구조가 변경될 경우 기존 select 규칙이 안먹힌다. 그 때 그 때 업데이트를 해주어야 정상적으로 동작할 것이다. (아래 예제가 안돌아가면 스스로 업데이트하길 바란다.)

파싱할 텍스트

<strong class="tit_thumb">  
<em class="emph_g"><a class="link_txt #series_title @2" href="/m/media/series/1366383">글로벌포스트</a></em>  
<a class="link_txt #article @2" href="http://v.media.daum.net/v/20191023082142459?f=m">中 암호화폐 투자자 "한국 시장은 고사 상태"</a>  
</strong>  
</li>  
<li>  
<a class="link_thumb #series_thumb @3" href="http://v.media.daum.net/v/20191023070002158?f=m">  
<img alt='[김현석의 월스트리트나우] "트럼프는 워런을 이기고 재선된다"' class="thumb_g" src="//img1.daumcdn.net/thumb/S176x136ht.u/?fname=https%3A%2F%2Fimg1.daumcdn.net%2Fnews%2F201910%2F23%2Fked%2F20191023070003367kwmc.jpg&amp;scode=media"/>  
</a>  
<strong class="tit_thumb">  
<em class="emph_g"><a class="link_txt #series_title @3" href="/m/media/series/465092">월스트리트나우</a></em>  
<a class="link_txt #article @3" href="http://v.media.daum.net/v/20191023070002158?f=m">"트럼프는 워런을 이기고 재선된다"</a>  
</strong>

태그로 가져오기

위에서 a태그들을 모두 가져와서 출력해 보자.
find_all은 리스트 타입으로 리턴한다. 앞에서부터 발견된 해당 태그들을 리스트 아이템으로 append 추가한다.
보통 너무 많이 출력되서 찾기가 힘들 정도이다. 하나씩 보자.

arta = soup.find_all("a")  
print(arta)

출력 결과

[<a class="link_daum #logo" href="http://m.daum.net/" id="daumLogo">
<img alt="Daum" height="25" src="//t1.daumcdn.net/media/news/news2016/m640/tit_daum.png" width="24"/>
</a>, <a class="tit_service #service_news" href="/m/media/" id="kakaoServiceLogo">뉴스</a>, <a class="link_relate link_entertain #service_enter" href="/m/entertain/">연예</a>, <a class="link_relate link_sport #service_sports" href="https://m.sports.media.daum.net/m/sports/">스포츠
                    </a>, <a class="link_search #GNB#default#search" href="http://mtop.search.daum.net/" id="link_search">
<span class="ico_media ico_search">통합검색</span>
</a>, <a class="link_gnb #media_home" href="/m/media/"><span class="txt_gnb">홈</span></a>, <a class="link_gnb #media_society" href="/m/media/society"><span class="txt_gnb">사회</span></a>, <a class="link_gnb #media_politics" href="/m/media/politics"><span class="txt_gnb">정치</span></a>, <a class="link_gnb #media_economic" href="/m/media/economic"><span class="screen_out">선택됨</span><span class="txt_gnb">경제</span></a>, <a class="link_gnb #media_foriegn" href="/m/media/foreign"><span class="txt_gnb">국제</span></a>, <a class="link_gnb #media_culture" href="/m/media/culture"><span class="txt_gnb">문화</span></a>, <a class="link_gnb #media_digital" href="/m/media/digital"><span class="txt_gnb">IT</span></a>, <a class="link_gnb #media_ranking" href="/m/media/ranking"><span class="txt_gnb">랭킹</span></a>, <a class="link_gnb #media_series" href="/m/media/series"><span class="txt_gnb">연재</span></a>, <a class="link_gnb #media_photo" href="/m/media/photo"><span class="txt_gnb">포토</span></a>, <a class="link_gnb #media_tv" href="/m/media/tv"><span class="txt_gnb">TV</span></a>, <a class="link_gnb #media_1boon" href="/m/media/1boon"><span class="txt_gnb">1boon</span></a>, <a class="link_gnb #media_exhibition" href="https://gallery.v.daum.net/p/home"><span class="txt_gnb">사진전</span></a>, <a class="link_thumb #article_thumb" href="http://v.media.daum.net/v/20191022192703507?f=m">
<img alt='WTO 개도국 지위 간담회 농민 반발로 파행..정부 "곧 결론낼 것"' class="thumb_g" src="//img1.daumcdn.net/thumb/S720x340ht.u/?fname=https%3A%2F%2Fimg1.daumcdn.net%2Fnews%2F201910%2F22%2Fyonhap%2F20191022192703823dgcc.jpg&amp;scode=media"/>
</a>, <a class="link_cont #article_main" href="http://v.media.daum.net/v/20191022192703507?f=m">
<strong class="tit_thumb">WTO 개도국 지위 간담회 농민 반발로 파행..정부 "곧 결론낼 것"</strong>
<span class="info_thumb"><span class="txt_cp">연합뉴스</span><span class="ico_news ico_reply">댓글수</span>25</span>
</a>, <a class="link_relate #article_sub @1" href="http://v.media.daum.net/v/20191022201613686?f=m">

클래스와 ID에 주목하라

보통 태그로 가져오게되면 여러군데 있는 정보들이 마구 섞여서 나온다. index 번호를 잘 찾는다 해도 금방 변경될 수 있다.
그나마 좀 나은 방법은 일반적으로 태그들의 속성이나 클래스를 두어 카테고리화하여 작성한 경우가 많으므로 그 정보들로 데이터를 잘 필터링해야 한다.
클래스로 검색하려면 soup.find 또는 find_all에서 class_=“클래스명” 지정해 주고, ID로 검색하려면 파라미터에 id=“아이디” 를 추가한다.
위 a 태그들 중에 기사 제목같은 것만 뽑고 싶은데, 클래스를 잘 보면 link_news 라고 된 부분만 추출해 보자.

arta = soup.find_all("a", class_='link_news')  
print(arta)

output

[<a class="link_news #RANKING#popular_female#article @1" href="http://v.media.daum.net/v/20191022040803988?f=m">
<em class="txt_age emph_g2">
<span class="num_news age20">20</span>대<span class="txt_arr">↓</span> </em>
                                        심상찮은 경제 2위 중국·4위 독일.. R의 공포 급속 확산
                                    </a>, <a class="link_news #RANKING#popular_female#article @2" href="http://v.media.daum.net/v/20191023143008200?f=m">
<em class="txt_age emph_g2">
<span class="num_news age30">30</span>대                                        </em>
                                        '내일채움공제' 첫 5년 만기자 탄생..중기부 "정책 확대·개선하겠다"
                                    </a>, <a class="link_news #RANKING#popular_female#article @3" href="http://v.media.daum.net/v/20191023161257078?f=m">
<em class="txt_age emph_g2"> 

어느 정도 뽑히면 이제 내부를 탐색

a 태그중 link_news 클래스 속성이 있는 것을 다 뽑았다. 여기서 딱 제목만 뽑고 싶은데…
태그내에 있는 텍스트만 추출하면?
a태그 하나씩 가져와서 텍스트만 출력하는데 텍스트 앞뒤 공백을 제거하자.

arta = soup.find_all("a", class_='link_news')  
for art in arta:  
    print(art.text.strip())

output

20대↓ 
                                        심상찮은 경제 2위 중국·4위 독일.. R의 공포 급속 확산
30대                                        
                                        '내일채움공제' 첫 5년 만기자 탄생..중기부 "정책 확대·개선하겠다"
40대                                        
                                        액상형 전자담배 '사용자제→중단' 권고..청소년 즉시중단

거의 다 나온 것 같은데, 쓸데없는 스트링이 더 있었다. 잘 보면 em 태그에 있는 것이 연령대 스트링이 추가된 것이다. 뒤에 기사제목이 별도의 태그가 없어서 태그로 추출도 어렵다.
이때는 내용들을 분해해서 list로 받아 index를 찾으면 된다. 하위 개체들 중 마지막이 해당 텍스트가 될 것이다.

arta = soup.find_all("a", class_='link_news')  
for art in arta:  
    print( art.contents[-1].strip() )

output

'내일채움공제' 첫 5년 만기자 탄생..중기부 "정책 확대·개선하겠다"
환자 1명이 '졸피뎀' 1만1456정 구입..국내 처방환자 176만명
액상형 전자담배 '사용자제→중단' 권고..청소년 즉시중단
돌아온 미세먼지의 나날들..'잿빛 하늘' 내년 봄까지 이어질 듯
구조조정 나선 LG디스플레이, 올해 적자 1조원 넘어설 듯
정부 "'개도국 포기' 논의" 농민들 불렀지만..시작부터 '아수라장'
경영난 위워크, 결국 손정의 품으로.."100억달러 더 투입"
이탄희 "검찰 전관예우 더 심각, 전화 한통 값 수천만원"

깔끔하게 제목만 뽑을 수 있었다.

좀 더 편하게 찾을 수는 없을까?

브라우저의 개발자 모드(F12 키를 누르면 나온다.)에서 원하는 텍스트를 찾아서 검사 또는 element 보기를 하면 해당 텍스트의 상위 태그 및 속성 정보들을 모두 볼 수 있다. 오른쪽창에서 해당 텍스트 위치가 있는 소스로 이동한다. 하단보면 태그 구조가 나온다.
이를 기반으로 필터링 규칙을 잘 잡으면 빨리 찾을 수 있을 것이다.
crawl1

위의 부분을 한 번 찾아보려고 시도했는데…

subnews = soup.find("div", "section_sub")  
realnews = subnews.find("div", "box_realtime")  
print(realnews)  
  
news = soup.find("span", "txt_g")  
print(news)

결과는

<div class="box_g box_realtime">
<h3 class="tit_g">실시간 주요 경제 뉴스</h3>
<ul category="economic" class="list_thumb">
</ul>
<a class="link_more #MAIN_NEWS#more" href="#none">더보기<span class="ico_news"></span></a>
</div>
None

안타깝게도 정보가 없다. 우리가 원하는 정보는 list_thumb 클래스ul 태그 내부인데 비어 있다.
실제로 이러한 경우가 종종 있다. 이 경우는 보통 html을 요청했을 때, javascript가 포함되어 브라우저에서 작동시켜야 내용이 채워지는 경우들이다. 따라서 html 자체만을 보는 것으로는 원하는 결과를 얻을 수 없다.

귀찮지만 이럴때는 다른 방식을 사용해야 한다.
가상의 브라우저를 만들어 JS를 구동시킨 결과를 파싱하면 되는 것이다.

다음화에서 계속…

Author: crazyj7@gmail.com

'Python' 카테고리의 다른 글

크롤링 BeautifulSoup 요약  (1) 2019.11.06
크롤링(Crawl) 2편  (2) 2019.10.27
인코딩에러 cp949  (1) 2019.10.02
ipynb와 py 양방향 전환  (2) 2019.09.30
ipynb 노트북 파일 형상관리  (1) 2019.09.27
반응형

외국에서 작성된 외부 패키지를 받아 실행할 때 가끔가다 인코딩 에러로 실행이 안되는 경우가 왕왕 있다. (보통은 한글 윈도우 환경에서 발생한다.)

이럴 때 간단하게 해결할 수 있는 방안이 있다.

PYTHON이 디폴트로 UTF8로 작동하도록 설정하는 것이다. (python 3.7에서 지원)

환경 변수 PYTHONUTF8을 만들어 1로 설정해 주면 된다.

SET PYTHONUTF8=1

아래는 그 예이다. 에러 메시지가 나오던 것이 환경변수 설정 후, 정상 동작하였다.

pythonutf8

'Python' 카테고리의 다른 글

크롤링(Crawl) 2편  (2) 2019.10.27
웹 크롤링 Crawl 1편  (0) 2019.10.24
ipynb와 py 양방향 전환  (2) 2019.09.30
ipynb 노트북 파일 형상관리  (1) 2019.09.27
초간단 python 서버만들기2  (0) 2019.09.25
반응형

노트북(ipynb)과 스크립트(py) 변환

ipynb를 다른 형식으로 변환

$ jupyter nbconvert --to script abc.ipynb
abc.py

$ jupyter nbconvert --to html abc.ipynb
abc.html

양방향 전환하는 유틸리티

  • ipynb와 py를 양방향으로 전환이 가능하다. (파라미터1을 파라미터2로 (확장자명) 변환한다.)

$ pip install ipynb-py-convert

설치 후, 아래 커맨드로 원하는 방향으로 변환한다.

$ ipynb-py-convert a.py a.ipynb

$ ipynb-py-convert b.ipynb b.py

'Python' 카테고리의 다른 글

웹 크롤링 Crawl 1편  (0) 2019.10.24
인코딩에러 cp949  (1) 2019.10.02
ipynb 노트북 파일 형상관리  (1) 2019.09.27
초간단 python 서버만들기2  (0) 2019.09.25
초간단 웹API서버만들기  (0) 2019.09.25
반응형
ipynbgit

jupyter 노트북 ipynb과 git 연동시 문제

ipynb 노트북 파일을 git에 올려서 형상관리를 하기란 쉽지 않다. 소스코드만이 아니라 output 이 포함되어 있고, 그 외 라인 번호 등 여러가지 추가 정보들 때문에 diff 하기도 정말 어려울 때가 많다. 나중에 충돌 발생하면 어떤 게 최신인지 모를 정도다.
정말 소스 텍스트만 diff 해 주면 좋을 텐데. 충돌도 덜 날 수 있을 텐데.
방법이 없을까???

jupytext를 이용하자.
jupytext를 사용하면 ipynb와 py를 쌍으로 자동 동기화가 가능하다. 주의할 점은 파일명은 동일하고 확장자명만 변경되므로 중복되지 않도록 조심해야 한다.

jupyter notebook에서 ipynb나 py 아무거나 연다음 jupytext 메뉴에 pair로 연결하게 하면 쌍으로 (ipynb, py) 파일이 생성되고, 어느 한 쪽이 수정되면 자동 변경 감지하여 업데이트하게 된다.
이로써 형상관리는 ipynb대신 py 파일 (script)만 관리하게 되면 편리하다. (diff도 source script만 하게되어 변경 내역을 확인할 수 있다.)

사용 준비

먼저 설치 패키지

pip install jupytext --upgrade

설정 변경
jupyter notebook --generate-config

.jupyter/jupyter_notebook_config.py 설정 파일 수정 (윈도우는 %USERPROFILE% 경로에서 찾으면 되고, 리눅스는 ~(home)에서 찾으면 된다.)
다음을 찾아 수정 또는 추가한다.

c.NotebookApp.contents_manager_class="jupytext.TextFileContentsManager"

노트북 재시작. (jupyter notebook)
ipynb 노트북 코드 생성을 하면 쌍으로 .py 파일이 생성된다.

image

Jupyter Lab은???

jupyter lab에서도 동일하게 사용할 수 있다. 왼쪽에 메뉴로 들어가서 jupy로 검색하면 pair가 있다. (jupytext 패키지가 설치된 경우)

image

Author: crazyj7@gmail.com

'Python' 카테고리의 다른 글

인코딩에러 cp949  (1) 2019.10.02
ipynb와 py 양방향 전환  (2) 2019.09.30
초간단 python 서버만들기2  (0) 2019.09.25
초간단 웹API서버만들기  (0) 2019.09.25
그래프 리셋(seaborn plot graph reset)  (0) 2019.09.20
반응형
flask2

초간단 웹서버 만들기2

1편과 같은 코드를 좀 더 간단하게 줄일 수 있다.

annotation을 추가하면 좀 더 직관적으로 보기가 편하다.
사용 방법은 URL과 method를 연결할 함수 정의부 앞에 추가해 주면 된다.

다음은 간결해진 코드이다. (이번에는 로그 기능을 off하였다)

'''
test api server
'''

from flask import Flask, request
from flask_restful import Resource, Api
from flask.views import MethodView

import logging
import json,base64

import os, sys
import datetime
import threading, time

app = Flask(__name__)

# log = logging.basicConfig(filename='testsvr.log', level=logging.INFO)
# 로깅을 전부 끄기
log = logging.getLogger('werkzeug')
log.disabled = True
app.logger.disabled = True

'''
/apitest1
'''
@app.route('/apitest1', methods=['GET'])
def apitest1_get():
    data = request.args
    print('recv:', data)  # dictionary
    abc = data.get('abc')
    if abc :
        result = 'This is GET method!'+str(abc)
    else:
        result = 'Hello World! input abc'
    return result

@app.route('/apitest1', methods=['POST'])
def apitest1_post():
    # get과 동일하게 작동
    return apitest1_get()


'''
/sum
'''
@app.route('/sum', methods=['GET'])
def sum_get():
    data = request.args
    print('recv:', data)  # dictionary
    return 'Hello.'

@app.route('/sum', methods=['POST'])
def sum_post():
    logging.info('sum test')
    # print('request.data=', request.data)  # binary data read all
    data=request.get_json(force=True) # parse json string
    print('request.json=', data)
    a = data['a']
    b = data['b']
    now = datetime.datetime.now()
    print(now)
    timestr = now.strftime('%Y%m%d %H:%M:%S')
    result = {
        'sum':int(a+b),
        'time':timestr
    }
    logging.info('result='+json.dumps(result))
    return result

port = 18899
if __name__=='__main__':
    print('Start Server... port=', port)
    logging.info('start server')
    app.run(host='0.0.0.0', port=port, debug=False)
    # 디버그 모드로 하면 소스 수정시 자동으로 서버 재시작이 된다.


Written with StackEdit.

'Python' 카테고리의 다른 글

ipynb와 py 양방향 전환  (2) 2019.09.30
ipynb 노트북 파일 형상관리  (1) 2019.09.27
초간단 웹API서버만들기  (0) 2019.09.25
그래프 리셋(seaborn plot graph reset)  (0) 2019.09.20
JupyterLab에서 Python Script(.py)실행하기  (0) 2019.09.19
반응형
flask

Simple Python Web API Server

쉽고 빠르게 웹 API 서버를 만드는 방법.
언어는 Python
아래 방식을 참고하면 아주 빠르고 간단하고 쉽게 API 서버를 만들 수 있다. 여기에 서비스에 필요한 작업들을 추가만 해 주면 된다.
POST 방식으로 JSON 포맷을 사용하여 통신하는 것을 추천한다.

개발툴로 PyCharm을 사용
패키지 설치

# pip install flask
# pip install flask_restful

아래 코드를 작성한다.

  • testsvr . py
'''
test api server
'''

from flask import Flask, request
from flask_restful import Resource, Api
from flask.views import MethodView

import logging
import json,base64

import os, sys
import datetime
import threading, time

app = Flask(__name__)
api = Api(app)

log = logging.basicConfig(filename='testsvr.log', level=logging.INFO)

# 로깅을 전부 끄기
# logging.getLogger('werkzeug')
# log = logging.get
# log.disabled = True
# app.logger.disabled = True

'''
/apitest1
'''
class apitest1(MethodView):
    def get(self):
        data = request.args
        print('recv:', data)  # dictionary
        abc = data.get('abc')
        if abc :
            result = 'This is GET method!'+str(abc)
        else:
            result = 'Hello World! input abc'
        return result

    def post(self):
        # get과 동일하게 작동
        return self.get()


'''
/sum
'''
class sum(MethodView):
    def get(self):
        data = request.args
        print('recv:', data)  # dictionary
        return 'Hello.'

    def post(self):
        '''
        JSON으로 받아서 작업 후 JSON으로 결과 반환
        '''
        logging.info('sum test')
        # print('request.data=', request.data)  # binary data read all
        data=request.get_json(force=True) # parse json string
        print('request.json=', data)
        a = data['a']
        b = data['b']
        now = datetime.datetime.now()
        print(now)
        timestr = now.strftime('%Y%m%d %H:%M:%S')
        result = {
            'sum':int(a+b),
            'time':timestr
        }
        logging.info('result='+json.dumps(result))
        return result


api.add_resource(apitest1, '/apitest1')
api.add_resource(sum, '/sum')

port = 18899

if __name__=='__main__':
    print('Start Server... port=', port)
    logging.info('start server')
    app.run(host='0.0.0.0', port=port, debug=True)
    # 디버그 모드로 하면 소스 수정시 자동으로 서버 재시작이 된다.


서버 구동 스크립트는 다음을 참고

---testsvr.bat---
c:\python37\scripts\python testsvr.py

---testsvr.sh---
#!/bin/bash  
  
# [python env path...]/bin/python testsvr.py  
# linux ex)  
/opt/anaconda3/envs/tensorflow/bin/python testsvr.py  
# windows command ex)  
# c:\python37\scripts\python testsvr.py

테스트 화면 : GET 방식
주소: http://localhost:18899/apitest1?abc=123&def=456
image

테스트 화면 : POST 방식, 덧셈 API
주소: http://localhost:18899/sum
POST 데이터: {“a”:5, “b”:6}
image

Written with StackEdit.

반응형
graphsetting_reset

그래프 설정 리셋

가끔가다 그래프 설정의 변경으로 잘 나오던 그래프가 깨지는 경우가 종종 나온다. matplotlib과 seaborn 등 여러가지를 막 섞어 쓰다보면 가끔 발생한다.

다음과 같이 잘 나오던 그래프가
image

어느 순간 다시 똑같은 코드를 실행했는데, 이런 결과가…
(위와 아래는 똑같은 코드다.)
image

Jupyter Lab에서 커널을 다시 기동해야지만 다시 원래대로 나오는데, 마찬가지로 중간에 어떤 작업으로 인해 그래프 설정이 변경되면 위와 같이 다시 이상하게 출력되었다. 나중에 원인을 찾아보니… 아래의 sns.set() 코드였다.
image
이후 부터는 이상한 그래프가 출력된 것이다. 원상 복구를 하는 것을 찾아보다가 reset해 주는 코드를 찾았다.
또한 설정값 변경된 것을 확인해 주는 코드도 있다.

image
위와 같이 pltconfig_default() 함수를 만들어 사용하면 원래 설정대로 복원된다.

참고로 다음은 plot 설정값이 디폴트에서 변경된 내역을 찾아주는 코드다.

# plot 환경설정 기본값과 달라진 점
class DictDiffer(object):
    """
    Calculate the difference between two dictionaries as:
    (1) items added
    (2) items removed
    (3) keys same in both but changed values
    (4) keys same in both and unchanged values
    """
    def __init__(self, current_dict, past_dict):
        self.current_dict, self.past_dict = current_dict, past_dict
        self.set_current, self.set_past = set(current_dict.keys()), set(past_dict.keys())
        self.intersect = self.set_current.intersection(self.set_past)
    def added(self):
        return self.set_current - self.intersect 
    def removed(self):
        return self.set_past - self.intersect 
    def changed(self):
        return set(o for o in self.intersect if self.past_dict[o] != self.current_dict[o])
    def unchanged(self):
        return set(o for o in self.intersect if self.past_dict[o] == self.current_dict[o])
    
def pltconfig_check():
    d=DictDiffer(plt.rcParams, plt.rcParamsDefault)
    for it in d.changed():
        print(it, plt.rcParamsDefault[it], plt.rcParams[it])

위에서 sns 환경설정 변경으로 기존의 세팅과 변경된 내역을 확인해 보자.
image
상당히 많은 설정값들이 변경된 것을 확인하였다.

image

다시 원래 디폴트로 돌아온 것이다. 위에서 나온 변경내역은 matplotlib inline으로 인해 변경된 내역이므로 신경쓰지 않아도 된다.

Author: crazyj7@gmail.com
Written with StackEdit.

'Python' 카테고리의 다른 글

초간단 python 서버만들기2  (0) 2019.09.25
초간단 웹API서버만들기  (0) 2019.09.25
JupyterLab에서 Python Script(.py)실행하기  (0) 2019.09.19
Jupyter Notebook 멀티라인출력  (0) 2019.09.19
진행(progress)바/ tqdm  (2) 2019.08.28
반응형
jupyterlabrunscript

JupyterLab에서 Python Script 실행

Jupyter Lab에서 노트북 ipynb 파일을 지원하는데 가끔은 python script (.py) 파일을 실행하고 싶을 때가 있다. 편리하게 실행할 방법은??

  • 일단 Jupyter Lab에서 python script 파일을 연다. (더블클릭)
  • 에디터 창에서 마우스 우클릭하여 콘솔 실행
    image
    -아래에 IPython 콘솔창이 화면분할되어 실행될 것이다. 파이썬 코드에서 plot 출력이 있다면 %matplotlib inline을 실행해 줘야 plot이 출력된다. (스크립트에 이미 이 코드가 포함되어 있으면 이 과정은 생략한다.)
    image
    -마지막으로 스크립트 에디터 창에서 컨트롤A (전체선택), 쉬프트엔터(실행) 하면 끝이다.
    image

Author: crazyj7@gmail.com

'Python' 카테고리의 다른 글

초간단 웹API서버만들기  (0) 2019.09.25
그래프 리셋(seaborn plot graph reset)  (0) 2019.09.20
Jupyter Notebook 멀티라인출력  (0) 2019.09.19
진행(progress)바/ tqdm  (2) 2019.08.28
Google Drive file upload/download  (0) 2019.08.20
반응형
multilineoutput

Jupyter Notebook에서 멀티라인 출력

Jupyter Notebook에서 변수값을 출력하기 위해서는 한 셀내에 변수명이나 함수명을 주면 해당 값(변수값, 리턴값)이 출력된다. 그러나 한 셀내에 여러 개의 변수명을 출력하고자 하게 되면 마지막 변수 한 개 값만 출력된다.
한 셀내의 여러 명령줄의 모든 출력을 하려면 각각의 변수 앞에 별도로 print 문을 사용해야 하는데 이쁘게 출력되지도 않고 매우 번거로운 작업이다.
이것을 한 번에 해결 할 수 있다.

from IPython.core.interactiveshell import InteractiveShell
InteractiveShell.ast_node_interactivity = "all"
  • Before: 한 셀에 복수개 출력 시도시 마지막값만 나온다.
    numpy_before

  • After:
    한 셀에 멀티 출력 지원
    numpy_after_multiline

Author: crazyj7@gmail.com
Written with StackEdit.

'Python' 카테고리의 다른 글

그래프 리셋(seaborn plot graph reset)  (0) 2019.09.20
JupyterLab에서 Python Script(.py)실행하기  (0) 2019.09.19
진행(progress)바/ tqdm  (2) 2019.08.28
Google Drive file upload/download  (0) 2019.08.20
Fourier Transform Python  (1) 2019.08.02

+ Recent posts